CNC Handwheel Explained: How to Use an MPG for Precise Axis Control
Sep 01, 2026
When operating a CNC intelligent stone carving machine, operators often need to move the spindle or worktable manually before starting a machining program. This is where the CNC handwheel, also known as an MPG (Manual Pulse Generator), becomes extremely useful.
Instead of relying only on buttons or automatic programs, the handwheel allows operators to make controlled manual movements along the machine axes. It is especially helpful during tool setting, workpiece positioning, origin finding, and fine adjustments.
Understanding how the handwheel works can help operators improve positioning accuracy and reduce the risk of tool collisions.
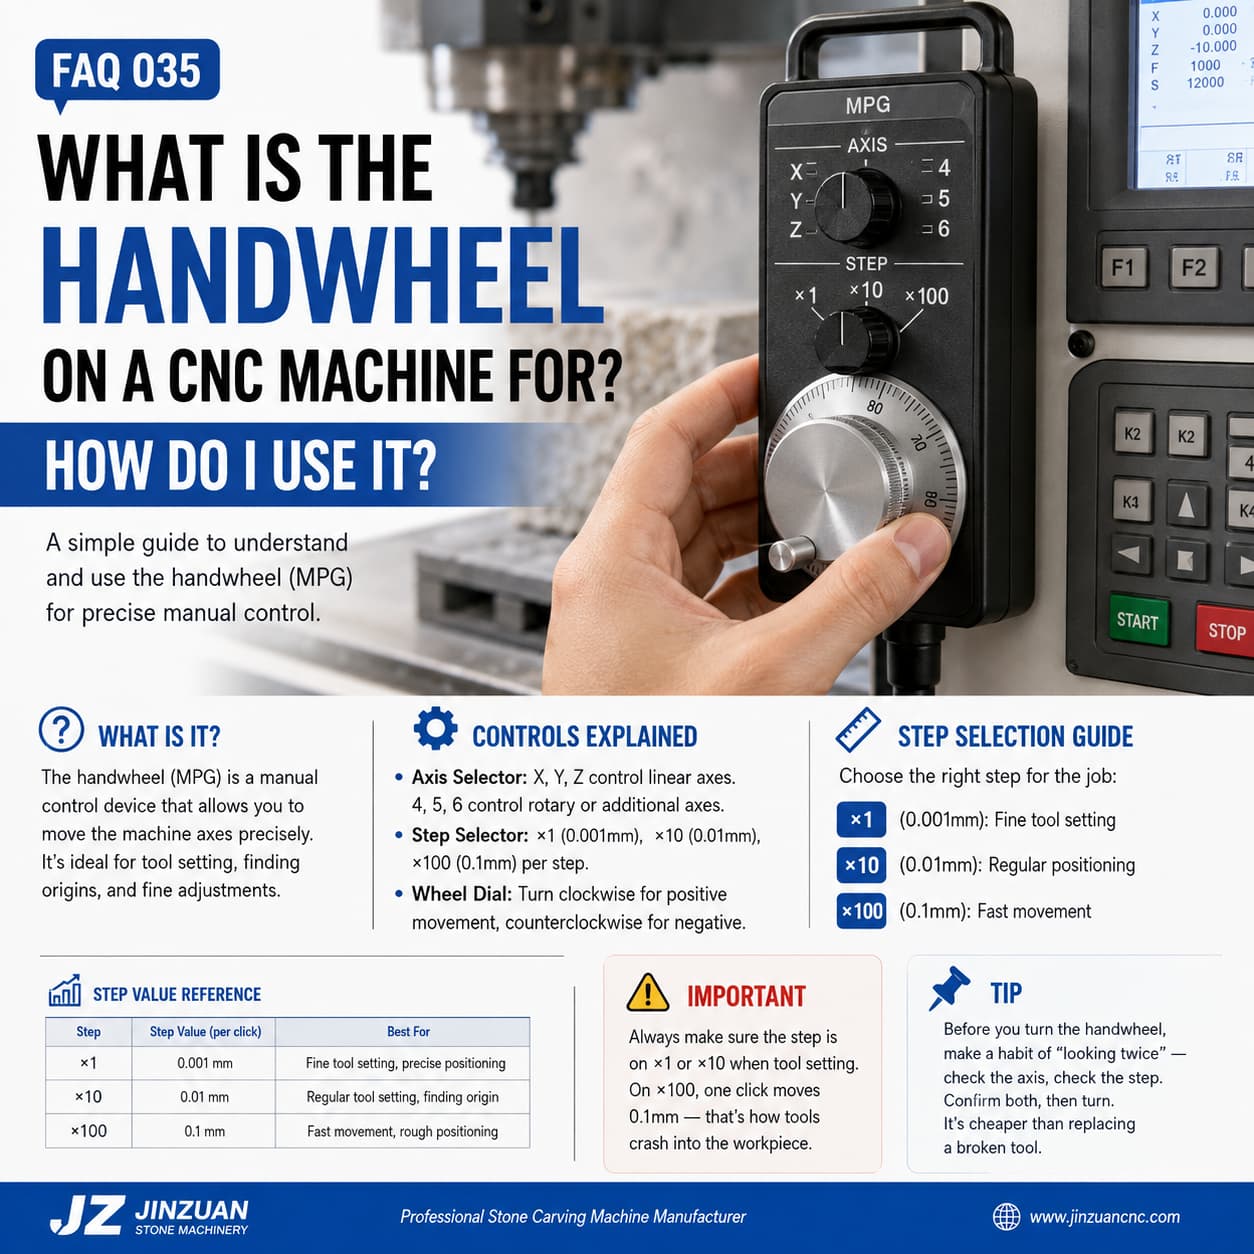
What Is a CNC Handwheel?
A CNC handwheel is a manual axis control device connected to the CNC controller.
By selecting an axis and a movement step, the operator can rotate the handwheel to move the selected machine axis. Compared with continuous button operation, an MPG provides more precise and intuitive control.
On a typical CNC stone carving machine:
X-axis: Controls left-to-right movement.
Y-axis: Controls front-to-back movement.
Z-axis: Controls up-and-down movement.
A/B/C or additional axes: May control rotary or tilting movements on 4-axis, 5-axis, or other multi-axis machines.
The exact axis configuration depends on the machine structure and CNC controller.
How Does a CNC Handwheel Work?
The operation is simple: Select the axis → Select the step → Turn the handwheel.
For example, if you want to move the Z-axis downward for tool setting:
Select the Z-axis.
Select a small step such as ×1 or ×10.
Slowly rotate the handwheel.
Observe the tool movement.
Stop when the tool reaches the required position.
This gives the operator direct control over the machine's movement.
Understanding the Three Main Controls
1. Axis Selector: Choose Where the Machine Moves
The axis selector determines which machine axis responds to the handwheel.
Axis Selection
Typical Function
Common Application
X
X-axis linear movement
Left/right positioning
Y
Y-axis linear movement
Front/back positioning
Z
Z-axis linear movement
Tool height adjustment
4
Additional/rotary axis
4-axis machining
5
Additional/rotary axis
5-axis machining
6
Additional axis
Multi-axis machining
Important: The meaning of axes 4, 5, and 6 depends on the machine configuration and controller. A standard 3-axis stone CNC machine normally requires only X, Y, and Z.
2. Step Selector: Decide How Far the Axis Moves
The step selector determines the movement distance generated by each handwheel pulse. On controllers using the commonly seen ×1, ×10 and ×100 settings, the smaller setting provides finer movement while the larger setting allows faster positioning.
Step Setting
Typical Movement Per Pulse
Best Application
×1
0.001 mm
Fine tool setting and precision adjustment
×10
0.01 mm
Normal positioning and origin finding
×100
0.1 mm
Fast movement and rough positioning
The actual movement increment depends on the CNC controller and machine configuration. Always refer to the machine's control system settings or manual.
3. Wheel Dial: Control the Movement Direction
After selecting the axis and step, rotate the handwheel to move the machine.
In a typical setup:
Clockwise: Positive direction
Counterclockwise: Negative direction
However, the actual positive and negative direction can vary according to the machine's coordinate system and controller settings. Therefore, when operating an unfamiliar CNC machine, make a small movement first and confirm the direction before making a larger adjustment.
Which Step Setting Should You Use?
Choosing the correct step is one of the most important parts of using an MPG.
×1: For Fine Adjustment
The ×1 setting is suitable when you need extremely small movements.
Typical applications include:
Fine tool setting
Precise Z-axis adjustment
Small position corrections
Final positioning before machining
When the cutting tool is already very close to the workpiece, a small movement is much safer than using a large step.
×10: For Regular Positioning
The ×10 setting provides a balance between speed and precision.
It can be used for:
Normal tool setting
Finding the workpiece origin
Position adjustment
Moving the spindle closer to the workpiece
For many daily operations, ×10 is a practical intermediate setting.
×100: For Fast Movement
The ×100 setting is designed for relatively fast positioning when the machine is far away from the target position.
It is useful for:
Rough positioning
Moving the spindle across a larger distance
Quickly approaching the work area
However, it should be used carefully when the cutting tool is close to the stone.
Why Is Step Selection So Important?
Imagine that the tool is only 0.2 mm away from the stone surface.
If you accidentally leave the handwheel at a relatively large movement setting, a single pulse may move the axis much farther than expected. This can result in:
Tool → Workpiece → Collision → Tool damage → Possible spindle or workpiece damage
Therefore, when performing tool setting, it is safer to switch to a fine step such as ×1 or ×10, then make small adjustments while watching the tool position.
How to Use a CNC Handwheel Safely
A simple operating habit can greatly reduce mistakes.
Step 1: Check the Machine Status
Before moving the axis, make sure the machine is in the appropriate manual/JOG/MPG control state and that there are no active alarms.
Step 2: Select the Correct Axis
Check whether you are controlling X, Y, Z, or another configured axis.
Step 3: Select the Step
Choose the movement increment according to the required positioning distance.
Far from the target → larger step
Close to the target → smaller step
Step 4: Make a Small Test Movement
If you are unfamiliar with the machine's direction, rotate the wheel slightly and observe the movement.
Step 5: Approach the Workpiece Slowly
When setting the tool close to the stone surface, use a smaller step and watch the tool continuously.
Step 6: Stop and Confirm
After reaching the desired position, stop turning the handwheel and verify the tool position before continuing with the next operation.
Common Mistakes When Using a CNC Handwheel
Mistake 1: Forgetting to Check the Axis
An operator may intend to move the Z-axis but accidentally select X or Y.
Solution: Always check the axis selector before turning the wheel.
Mistake 2: Using ×100 During Fine Tool Setting
A large step can cause the tool to move too far when only a tiny adjustment is needed.
Solution: Switch to ×1 or ×10 when the tool approaches the workpiece.
Mistake 3: Turning the Wheel Without Watching the Tool
The handwheel gives manual control, but the operator still needs to observe the actual machine movement.
Solution: Keep your eyes on the tool, workpiece, and coordinate display.
Mistake 4: Assuming Every CNC Machine Uses the Same Settings
Different CNC controllers may have different MPG configurations, axis assignments, pulse increments, and direction settings.
Solution: Follow the controller configuration and the machine manufacturer's operating instructions.
Where Is the Handwheel Used in Stone CNC Machining?
For stone CNC carving machines, the MPG is particularly useful during preparation and setup.
Tool Setting: Precise positioning between the cutting tool and stone surface
Adjust the Z-axis before machining.
Fine-tune the tool height.
Reduce positioning errors during setup.
Workpiece Positioning: Aligning the stone before carving
Move the spindle to the required starting position.
Check the workpiece edges.
Adjust the machining origin.
Origin Finding: Establishing the machining reference point
Move the tool close to the selected reference position.
Make small adjustments.
Confirm the machine coordinates before running the program.
Program Verification: Checking the machining area
Manually inspect the tool path area.
Confirm clearance between the tool and workpiece.
Help identify potential positioning problems before automatic machining.
A Simple Rule to Remember
Using a CNC handwheel does not have to be complicated. Just remember:
Check the Axis → Check the Step → Turn Slowly → Watch the Tool
A useful habit is to “look twice before turning once.” Before every manual movement, quickly check:
1. Which axis am I controlling?
2. Which step setting am I using?
This simple two-second check can prevent unnecessary tool collisions and reduce the risk of damaging the cutting tool or workpiece.
Final Thoughts
The CNC handwheel is a small but important part of a CNC machine. It gives operators direct manual control and makes tasks such as tool setting, positioning, origin finding, and machine inspection easier and more precise.
For stone CNC carving applications, learning to use the MPG correctly is especially valuable because stone tools and workpieces can be costly to replace.
The key is not simply knowing how to turn the handwheel, but knowing when to use each axis, when to change the step, and when to slow down.
Master these basic operations, and CNC machine setup becomes safer, more controlled, and more efficient.
Read More










 IPv6 network supported