Enter product details (such as color, size, materials etc.) and other specific requirements to receive an accurate quote.

leave a message

If you are interested in our products and want to know more details,please leave a message here,we will reply you as soon as we can.
submit
other

Blog

Home

Blog

  • Is Installing a Stone Carving Machine Difficult?
    Is Installing a Stone Carving Machine Difficult?
    Jun 25, 2026
    A Complete Guide for First-Time Buyers When purchasing a CNC stone carving machine, many customers focus on machining accuracy, spindle power, and processing capability. However, one common question often appears before placing an order:   “Is the machine installation complicated? Can we install it by ourselves?”   For many small and medium stone processing workshops, installation difficulty directly affects production startup time and labor costs. The good news is that modern CNC stone carving machines are designed with a more user-friendly structure, making installation much easier than many buyers expect.   Why Do Buyers Worry About CNC Stone Machine Installation? Traditional industrial equipment often requires complicated assembly, professional electricians, and multiple technicians for wiring and adjustment. This creates concerns such as: Do I need to hire a professional engineer? Is the electrical connection complicated? How long will installation take? Will incorrect installation affect machine accuracy? For a well-designed stone carving machine, these concerns can be minimized through integrated machine design and simplified setup procedures.   Modern Stone Carving Machines Are Designed for Easy Installation A reliable CNC stone carving machine is usually delivered with the main electrical components already integrated.   The control system is installed inside the machine structure before shipment, which means:   No complicated wiring. No complicated electrical assembly.   After receiving the machine, users mainly need to complete several basic steps:   1. Place the Machine on a Stable Foundation First, move the machine frame to the prepared working area. A flat and solid floor is important because: It helps maintain machining stability It reduces vibration during engraving It supports long-term accuracy After positioning the machine, adjust the leveling feet to make sure the machine body is balanced.   2. Connect the Water Cooling System For stone CNC machines equipped with water-cooled spindles, the water chiller is usually packed separately during transportation. Installation only requires: Connecting the inlet and outlet water hoses Checking that the water circulation direction is correct Filling the chiller with suitable coolant The cooling system helps maintain stable spindle temperature during long engraving operations.   3. Power On and Perform a Basic Test After connecting the power supply: Turn on the water chiller Start the machine control system Check the machine movement Test the spindle operation If everything works normally, the machine is ready for production. For experienced operators, the whole process can often be completed in around one hour.   Do You Need Professional Technicians? For standard stone carving machines, installation does not always require a large technical team. One trained operator can complete the basic setup by following: Installation manuals Video instructions Remote technical support For customers who are familiar with machinery operation, self-installation is usually practical. For larger machines or customized production lines, professional installation service may still be recommended to ensure faster commissioning.   What Should You Prepare Before the Machine Arrives? To make installation smoother, buyers can prepare in advance: Suitable Workshop Space Make sure there is enough room for: Machine placement Material loading Operator movement Maintenance access   Stable Power Supply Prepare the correct voltage according to the machine specification. A stable electrical environment helps protect: CNC controller Spindle motor Drive system   Water and Drainage Arrangement For water-cooled systems, prepare a convenient location for: Coolant filling Water circulation Regular maintenance   Common Installation Mistakes to Avoid Even though installation is simple, some details still matter.   Installing on Uneven Ground An unstable foundation may cause: Increased vibration Reduced machining quality Long-term mechanical stress   Running the Spindle Without Checking Cooling Water Before spindle operation, always confirm that coolant circulation is working properly.   Ignoring Machine Leveling Proper leveling helps maintain cutting and engraving accuracy, especially for detailed stone carving work.   FAQ Q1: Can one person install a stone carving machine? Yes. For standard models, one person can handle basic installation with proper preparation and guidance.   Q2: Do I need to connect many wires after receiving the machine? Usually no. The control box is integrated with the machine before shipment. Users mainly need to connect the power supply and cooling system.   Q3: How long does installation take? For experienced users, basic setup can often be completed within about one hour.   Q4: Does installation affect machine accuracy? Yes. Proper leveling and correct setup help maintain machining precision and stable operation.   Q5: Can suppliers provide installation support? Yes. Many manufacturers provide installation videos, operation manuals, and remote technical assistance.   Conclusion: Easy Installation Means Faster Production A CNC stone carving machine does not have to be difficult to install. With an integrated control system, simplified connections, and clear guidance, many users can complete the basic setup without complicated technical knowledge.   For workshops that want to start production quickly, choosing a machine with a user-friendly installation design can reduce downtime and make CNC stone processing more accessible.   Easy installation is not only about convenience — it is also an important part of improving production efficiency from day one.    
    Read More
  • How to Select the Right Spindle Power for Stone CNC Machines
    How to Select the Right Spindle Power for Stone CNC Machines
    Jun 16, 2026
    When purchasing a stone CNC machine, many buyers focus on machine size, controller systems, or guide rails while overlooking one of the most critical components—the spindle.   The spindle is the "heart" of a Industrial CNC Stone Machine. Its power directly affects cutting speed, engraving efficiency, tool life, surface finish quality, and even long-term operating costs.   Choosing a spindle that is too small can result in slow production, frequent overload alarms, and reduced productivity. On the other hand, selecting an oversized spindle may lead to unnecessary investment, higher electricity consumption, and increased maintenance costs.   So, how do you determine the right spindle power for your stone processing needs?   This guide explains the differences between spindle power options, practical application scenarios, and the key factors stone fabricators should consider before purchasing a CNC stone machine.   Why Spindle Power Matters The spindle provides the rotational force that drives cutting tools, engraving bits, polishing tools, and milling cutters. In stone processing applications, spindle power influences: Material removal rate Cutting depth capability Tool lifespan Surface finish quality Processing speed Machine stability under heavy loads For example: A 5.5kW spindle may successfully engrave granite lettering but struggle when performing deep 3D relief carving on dense black granite for 10 consecutive hours. Meanwhile, an 11kW spindle can maintain stable torque and temperature under the same workload, reducing processing time by approximately 20%-35%. For workshops operating continuously, spindle selection directly impacts production capacity.   Common Spindle Power Options for Stone CNC Machines The most common spindle powers in the stone industry include: Spindle Power Typical Applications 3.0kW - 4.5kW Light engraving, marble lettering, small crafts 5.5kW Standard stone engraving and relief carving 7.5kW Mixed carving and cutting operations 9.0kW Heavy-duty granite processing 11kW Industrial-scale carving and cutting 15kW+ Large-scale production and deep machining Each option serves different production requirements.   Application Scenario Analysis Scenario 1: Tombstone Manufacturing Most tombstone factories process: Portrait engraving Letter carving Decorative borders Relief artwork Common materials: Granite Black granite G654 granite India Black granite Recommended spindle: 5.5kW to 7.5kW Reason: These operations require precision rather than aggressive material removal. A 5.5kW spindle can easily perform: 3D portrait engraving V-groove lettering Fine relief carving while maintaining excellent detail quality.   Scenario 2: Architectural Decoration Production Products include: Stone wall panels Decorative columns Fireplace surrounds Luxury hotel stone artworks Materials: Marble Travertine Limestone Artificial stone Recommended spindle: 7.5kW to 11kW Reason: These projects often involve larger tools and deeper cutting depths. For example: When carving a 2-meter marble column continuously for 48 hours, an 11kW spindle provides stronger torque and better thermal stability than a 5.5kW spindle.   Scenario 3: Granite Countertop Manufacturing Operations include: Sink cutouts Edge profiling Drilling Slot milling Recommended spindle: 9kW to 11kW Reason: Granite is significantly harder than marble. Higher spindle power helps maintain cutting efficiency while reducing tool wear. In practical production environments, factories using 11kW spindles often achieve 20%-30% faster machining speeds than facilities using 5.5kW units on identical granite countertops.   Scenario 4: Large-Scale Stone Sculpture Production Products include: Garden sculptures Religious statues Monument sculptures Urban landscape projects Recommended spindle: 11kW to 15kW Reason: These applications require extensive rough machining before fine finishing. A high-power spindle removes large volumes of material more efficiently, significantly reducing roughing time. For example: A 1.8-meter granite statue may require removing over 300kg of material during rough processing. An 11kW spindle can reduce rough machining time by several hours compared with a 5.5kW spindle.   Comparison: Low-Power vs High-Power Spindles Factor Low-Power Spindle (5.5kW) High-Power Spindle (11kW) Initial Cost Lower Higher Energy Consumption Lower Higher Granite Processing Moderate Excellent Deep Relief Carving Acceptable Excellent Tool Life Average Longer Production Efficiency Moderate High Continuous Operation Limited Strong Industrial Production Not Ideal Recommended The best spindle is not necessarily the most powerful one. The best spindle is the one that matches your actual production requirements.   Key Questions to Ask Before Choosing Spindle Power Before purchasing a stone CNC machine, answer these questions: What materials will you process?  Harder materials generally require higher spindle power. How many hours will the machine run daily? For continuous industrial production, larger spindle power usually provides greater reliability. What is your primary operation? Heavy cutting operations demand more spindle power than decorative engraving. What are your future expansion plans? Selecting a slightly larger spindle today can prevent costly upgrades later.   Common Mistakes Buyers Make Mistake 1: Choosing the Cheapest Option Some buyers focus only on machine price. A spindle that saves $500 initially may cost thousands in productivity losses over several years.   Mistake 2: Assuming Bigger Is Always Better An oversized spindle increases: Purchase cost Electricity consumption Maintenance expenses without providing meaningful benefits for light-duty applications.   Mistake 3: Ignoring Material Hardness A spindle suitable for marble may struggle significantly when processing dense granite. Always choose based on the hardest material you expect to machine.   How Professional Stone Factories Select Spindles Experienced fabricators usually follow this logic: Mainly Marble + Light Engraving → 5.5kW Spindle   Mixed Marble and Granite Production → 7.5kW to 9kW Spindle   Granite Countertops + Deep Carving → 11kW Spindle   Industrial Sculpture Production → 11kW to 15kW Spindle This approach balances efficiency, cost, and long-term reliability.   Frequently Asked Questions Q1: Is a 5.5kW spindle enough for granite? Yes, for lettering, portrait engraving, and light relief carving. However, for heavy granite cutting or deep 3D carving, 7.5kW to 11kW is generally recommended.   Q2: Does higher spindle power always mean faster machining? Not necessarily. Machining speed also depends on: Tool quality Feed rate Controller system Machine rigidity Cooling system Spindle power is only one part of overall performance.   Q3: What spindle power is best for a stone engraving business? For most engraving-focused workshops, a 5.5kW or 7.5kW spindle provides an excellent balance between cost and productivity.   Q4: How long can an 11kW spindle run continuously? A high-quality industrial spindle with proper cooling can operate continuously for multiple shifts while maintaining stable performance. Actual lifespan depends on maintenance, operating environment, and workload.   Final Thoughts Selecting the right spindle power is one of the most important decisions when purchasing a Reliable Stone CNC Machine. Instead of simply choosing the lowest-cost or highest-power option, evaluate: Material type Production volume Processing depth Daily operating hours Future business expansion plans For most stone fabrication shops, a 5.5kW to 11kW spindle covers the majority of production needs. Matching spindle power to your actual applications will improve efficiency, extend tool life, reduce downtime, and maximize return on investment. A properly selected spindle is not just a machine component—it is a long-term productivity investment for your stone processing business.
    Read More
  • Hidden Costs When Buying CNC Machines
    Hidden Costs When Buying CNC Machines
    Jun 09, 2026
    What Most Buyers Overlook When purchasing a CNC machine, most buyers focus on one thing first: the machine price.   A supplier offers a CNC machine for $15,000, while another quotes $20,000 for a seemingly similar model. Naturally, many buyers are tempted by the lower price.   However, experienced manufacturers know that the purchase price is only part of the total investment.   The real cost of a CNC machine includes installation, tooling, maintenance, software, training, downtime, spare parts, energy consumption, and many other factors that may not appear on the quotation sheet.   In fact, a machine that costs 20% less initially can sometimes cost 50% more over its service life.   This article explores the hidden costs of buying CNC machines and explains how to evaluate the true long-term value of a machine before making a purchasing decision.   Why Focusing Only on Machine Price Can Be Expensive Imagine two stone fabrication companies purchasing Cost-Effective CNC stone carving machines. Machine A Purchase Price: $18,000 Standard spindle Basic control system Limited technical support Machine B Purchase Price: $24,000 Industrial-grade spindle Advanced motion control Remote diagnostics Comprehensive training At first glance, Machine A appears to save $6,000. However, after three years: Cost Item Machine A Machine B Initial Purchase $18,000 $24,000 Spare Parts $4,500 $1,500 Downtime Losses $8,000 $2,000 Operator Training $2,000 Included Software Upgrades $2,500 Included Total Cost $35,000 $27,500 The cheaper machine ultimately becomes the more expensive investment.   This is why professional buyers evaluate Total Cost of Ownership (TCO) rather than focusing solely on purchase price.   1. Installation and Commissioning Costs Many CNC buyers underestimate setup expenses. Depending on machine size and configuration, installation may require: Foundation preparation Electrical modifications Air compressor systems Water recycling systems Crane or forklift rental Technician travel expenses Example A large bridge saw or 5-axis stone CNC machine may require: 380V industrial power supply Reinforced concrete foundation Cooling water circulation system These additional requirements can add several thousand dollars to the project budget. Before purchasing, always ask suppliers: Is installation included? Are travel expenses included? What site preparation is required?   2. Tooling Costs Are Often Underestimated The machine itself cannot produce parts without tools. For stone processing, tooling may include: Diamond blades Milling cutters Engraving bits Profiling wheels Polishing tools Many first-time buyers budget for the machine but forget that tooling is a recurring expense. Real Example A stone workshop producing granite countertops may consume: 3–6 diamond tools per month Multiple polishing wheels annually Replacement cutting blades every few months Over several years, tooling costs can equal a significant percentage of the machine's purchase price.   3. Software Licensing Fees Modern Industrial CNC machines increasingly rely on specialized software. Some suppliers provide software permanently. Others charge annual licensing fees. Common software expenses include: CAD software CAM software Nesting software Toolpath generation software Remote monitoring platforms Software Model Cost Structure Lifetime License One-time payment Subscription License Annual recurring fees Cloud-Based Platform Monthly fees Always verify: Is software permanently licensed? Are future upgrades free? What happens if the subscription expires?   4. Operator Training Costs Even the best CNC machine cannot perform well without trained operators. Many manufacturers discover that insufficient training leads to: Material waste Tool breakage Programming mistakes Production delays Example A stone carving machine may achieve ±0.1mm accuracy under normal operation. However, an inexperienced operator can easily generate toolpath errors that waste expensive marble or granite slabs. Comprehensive training often provides a much better return than choosing the cheapest machine.   5. Downtime Can Be More Expensive Than Repairs One hidden cost that buyers rarely calculate is downtime. When a machine stops working: Production stops Deliveries are delayed Employees remain idle Customer satisfaction suffers Practical Scenario A stone factory producing custom kitchen countertops may lose multiple projects if a CNC machine remains offline for one week waiting for replacement parts. The actual cost is not the repair itself. The real cost is lost production. When evaluating suppliers, ask: Do they provide remote troubleshooting? Are spare parts stocked locally? What is the average response time?   6. Spare Parts Availability Low-cost CNC machines often use components that are difficult to source internationally. Common replacement items include: Servo drives Motors Sensors Spindles Bearings Control boards If replacement parts require weeks of shipping time, production disruptions can become extremely costly. A reliable supplier should provide: Spare parts inventory Technical documentation Long-term support commitments   7. Energy Consumption Costs Energy expenses accumulate every day. Industrial CNC machines may operate: 8 hours per day 16 hours per day 24-hour continuous production Over time, differences in efficiency become significant. Example A stone cutting machine operating 12 hours daily may consume thousands of kilowatt-hours each month. Machines equipped with: High-efficiency motors Intelligent power management Variable frequency drives often reduce long-term operating costs considerably.   8. Quality Problems and Material Waste Machine precision directly impacts profitability. Poor machine stability can cause: Incorrect dimensions Surface defects Excessive chipping Rejected products Stone Processing Example When processing premium marble slabs worth hundreds or thousands of dollars, a single cutting error can exceed the cost of several machine maintenance visits. Higher machine accuracy often means lower material waste.   9. Future Upgrade Costs Production requirements change over time. A machine that cannot be upgraded may become obsolete much faster. Important upgrade options include: Automatic tool changers Additional axes Vision systems Automation modules Smart factory integration Machines designed with expansion capability generally provide better long-term value.   How to Identify a CNC Supplier with Lower Long-Term Costs Instead of asking only: "What is the machine price?" Ask: What is the expected machine lifespan? How quickly can spare parts be delivered? What training is included? Are software updates free? What maintenance is required annually? What is the average downtime rate? Can the machine be upgraded in the future? What technical support is available after installation? These questions often reveal more value than the quotation itself.   Conclusion The price tag on a CNC machine tells only part of the story.   The most successful manufacturers evaluate the complete lifecycle cost of the equipment, including installation, tooling, software, training, maintenance, spare parts, energy consumption, and downtime risks.   A machine that appears more expensive initially may ultimately deliver lower operating costs, higher productivity, and a faster return on investment.   Before signing a purchase agreement, look beyond the quotation and calculate the true cost of ownership. Doing so can save your business thousands of dollars and prevent costly surprises in the years ahead.
    Read More
  • How to Optimize Your Stone Production Workflow
    How to Optimize Your Stone Production Workflow
    Jun 02, 2026
    A Practical Guide to Increasing Efficiency, Reducing Costs, and Improving Stone Processing Quality In today's highly competitive stone industry, profitability depends on more than just having skilled workers and quality materials. The efficiency of your production workflow directly impacts delivery times, labor costs, product consistency, and customer satisfaction.   Whether you operate a stone fabrication shop, monument factory, countertop workshop, architectural stone processing facility, or large-scale stone manufacturing plant, optimizing your production workflow can significantly improve productivity while reducing operational expenses.   This guide explores practical strategies, equipment upgrades, and workflow improvements that can help stone manufacturers maximize output and stay competitive in the global market.   Why Workflow Optimization Matters in Stone Processing Many stone factories focus on purchasing new machines but overlook the inefficiencies hidden within their production processes. Common workflow problems include: Excessive manual handling of stone slabs Repeated measurements and layout errors Machine downtime due to poor scheduling Bottlenecks between cutting, carving, and polishing stages High labor dependency Material waste caused by inaccurate cutting For example, a factory processing granite memorials may spend more time moving stone between workstations than actually machining it. In some cases, production delays are caused not by machine speed but by poor workflow planning. Optimizing workflow helps manufacturers: ✓ Increase daily production capacity ✓ Reduce labor costs ✓ Minimize material waste ✓ Improve product consistency ✓ Shorten delivery times ✓ Increase profit margins   Step 1: Analyze Your Existing Production Process Before investing in new equipment, evaluate your current workflow. Map every production stage: Material Receiving——Stone Storage——Slab Loading——Cutting——Carving——Edge Profiling——Polishing——Quality Inspection——Packaging——Shipping Track: Processing time at each stage Waiting time between operations Machine utilization rates Labor requirements Material waste percentages Many factories discover that bottlenecks occur at only one or two stages, making targeted improvements far more cost-effective than a complete equipment replacement.   Step 2: Automate Repetitive Operations Manual operations often create the largest productivity losses.   Example: Manual Layout vs CNC Processing Process Manual Method CNC Method Measuring Operator-dependent CAD/CAM controlled Cutting Accuracy Varies by worker Consistent and precise Production Speed Slower Faster Material Waste Higher Lower Repeatability Limited Excellent Labor Requirement More operators needed Fewer operators required Complex Designs Difficult and time-consuming Easily automated A CNC stone engraving machine can automatically process complex relief carvings, decorative borders, lettering, and 3D sculptures with minimal operator intervention.   For example, a Heavy-Duty Stone CNC Router can continuously process granite and marble patterns for multiple hours while maintaining consistent dimensional accuracy, reducing the need for rework.   Step 3: Reduce Material Handling Time Moving stone is often one of the most time-consuming activities in a workshop. Heavy slabs may be transferred multiple times before completion. To improve efficiency: Position machines according to production sequence. Use vacuum lifters and slab handling systems. Create dedicated loading and unloading zones. Minimize unnecessary transportation routes. Optimized Workflow Example Traditional Layout: Storage → Cutting → Storage → Carving → Storage → Polishing Optimized Layout: Storage → Cutting → Carving → Polishing → Packaging Reducing unnecessary movement can save dozens of labor hours each week.   Step 4: Invest in Multi-Function Stone Machinery One of the most effective ways to streamline production is to use equipment capable of performing multiple operations. Traditional Setup Bridge Saw Profiling Machine Engraving Machine Drilling Machine Integrated CNC Solution A modern stone CNC machining center can perform: Cutting, Milling, Engraving, Drilling, Profiling, Relief carving By reducing machine transfers, manufacturers improve workflow continuity and reduce labor requirements. For custom countertop fabrication, monument production, and architectural stone projects, integrated processing often delivers significantly higher efficiency.   Step 5: Optimize Tool Management Tool wear directly affects machining quality and production efficiency. Signs of poor tool management include: Chipped edges Rough surface finishes Slower cutting speeds Increased machine vibration Practical Example A worn diamond tool may increase cutting time by 20–30% while producing lower-quality results. Best practices include: Scheduled tool inspections Tool life tracking Proper storage conditions Using application-specific diamond tools For example: Granite carving requires different tooling than marble carving. Thick monument stones require different cutting parameters than thin decorative panels.   Step 6: Implement Digital Production Planning Many factories still rely on paper schedules and verbal instructions. Digital production management provides: Real-time job tracking Machine scheduling Production reporting Inventory monitoring Delivery planning Benefits include: Reduced communication errors Better machine utilization Improved delivery reliability When multiple CNC machines operate simultaneously, digital planning can significantly reduce idle time and production conflicts.   Step 7: Reduce Rework Through Quality Control Rework is one of the most expensive hidden costs in stone manufacturing. Common causes include: Incorrect dimensions Design mistakes Surface defects Poor polishing consistency Implement inspections at key stages: Before Cutting Verify: Stone dimensions Material quality CAD drawings Before Polishing Verify: Surface quality Profile accuracy Engraving depth Before Packaging Verify: Final dimensions Finish quality Customer specifications Early detection prevents costly reprocessing later.   Step 8: Use Specialized Machines for High-Volume Production Different applications require different equipment. Countertop Production Recommended Equipment: Bridge Saw CNC Machining Center Edge Polishing Machine Monument Production Recommended Equipment: Stone Engraving Machine Laser Engraving Machine Tombstone Polishing Machine Architectural Decoration Recommended Equipment: Waterjet Cutting Machine CNC Stone Carving Machine Profiling Machine Choosing the right machine for each production task improves throughput and reduces bottlenecks.   Frequently Asked Questions (FAQ) Q1: What is the fastest way to improve stone production efficiency? The quickest improvement often comes from identifying bottlenecks and automating repetitive operations such as cutting, engraving, or profiling.   Q2: Does a CNC stone machine really reduce labor costs? Yes. One skilled operator can often supervise multiple automated processes, reducing dependence on large production teams while improving consistency.   Q3: How can I reduce stone material waste? Accurate CAD/CAM programming, optimized nesting layouts, and precision CNC cutting help maximize material utilization.   Q4: Which stone processing stage usually causes delays? In many factories, polishing and manual finishing create the largest bottlenecks due to labor-intensive operations.   Q5: Is workflow optimization more important than buying new machines? Often, yes. Improving production layout and process management can generate significant efficiency gains before major equipment investments are required.   Final Thoughts Optimizing your stone production workflow is not simply about working faster—it's about creating a smarter, more efficient manufacturing system.   By analyzing bottlenecks, reducing material handling, automating repetitive tasks, implementing digital planning, and investing in the right stone processing equipment, manufacturers can increase output, improve quality, and strengthen their competitive position in the global market.   As demand for customized stone products continues to grow, factories that combine advanced stone machinery with efficient production management will be best positioned for long-term success.
    Read More
  • Is Infrared Laser Guidance Necessary for Accurate Stone Cutting?
    Is Infrared Laser Guidance Necessary for Accurate Stone Cutting?
    May 26, 2026
    In modern stone fabrication, precision is no longer just a competitive advantage — it is a basic requirement. Whether processing granite countertops, marble slabs, quartz surfaces, tombstones, or architectural stone panels, customers expect clean edges, exact dimensions, and minimal material waste.   One feature that many buyers notice when choosing a stone cutting machine is infrared laser guidance. Some suppliers promote it as an essential accuracy tool, while others treat it as an optional accessory. This raises an important question:   Is infrared laser guidance truly necessary for accurate stone cutting, or is it simply a convenience feature? The answer depends on the cutting application, operator experience, production volume, and the level of precision required. In this article, we will explain how infrared laser guidance works, where it delivers real value, and when a stone factory can operate efficiently without it.   What Is Infrared Laser Guidance in Stone Cutting Machines? Infrared laser guidance is a positioning system installed on stone bridge saws, edge cutting machines, and manual cutting equipment. It projects a visible laser line directly onto the stone surface, allowing operators to align the blade path before cutting. The system is commonly used on: Infrared bridge saw machines Manual stone cutting machines CNC bridge saws Granite slab cutting equipment Marble tile cutting machines Stone edge trimming machines The laser line acts as a visual reference. Before the blade touches the material, the operator can verify: Cutting direction Alignment accuracy Slab positioning Cutting angle Material waste area In many factories, especially those processing expensive natural stone, this simple visual aid significantly reduces human positioning errors.   How Infrared Laser Guidance Improves Cutting Accuracy Although the laser itself does not physically cut the stone, it helps operators achieve more precise positioning before cutting begins. 1. Reduces Manual Alignment Errors Without laser guidance, operators often rely on: Measuring tapes Chalk lines Hand marking Visual estimation These methods depend heavily on operator experience. Infrared guidance provides a direct cutting reference line, helping operators align the blade faster and more accurately. For example: In a countertop processing workshop cutting quartz slabs worth over $500 per piece, even a 3–5 mm positioning mistake may ruin sink openings or backsplash alignment. Infrared laser positioning helps reduce these risks before cutting starts.   2. Improves Efficiency During Repetitive Cutting Factories processing large production volumes benefit greatly from faster alignment. For example: A stone workshop producing 200–300 marble tiles daily can save several seconds on every alignment operation. Over a full production shift, infrared guidance may reduce setup time by more than 15%. This is especially valuable for: Tile production Tombstone processing Standard-size slab cutting Batch fabrication orders   3. Helps New Operators Work More Confidently Experienced operators can often align cuts manually with high accuracy. However, new workers may struggle with: Reading blade positions Understanding offset distances Maintaining consistent alignment Infrared guidance shortens the learning curve. Factories facing labor shortages or high employee turnover often prefer machines equipped with laser guidance because training becomes easier and production consistency improves.   Is Infrared Laser Guidance More Important Than Machine Structure? No. This is one of the biggest misunderstandings in the stone machinery market. Many buyers focus heavily on laser positioning while ignoring the machine’s actual mechanical quality.   In reality, cutting accuracy depends primarily on: Factor Influence on Accuracy Machine frame stability Extremely high Linear guide quality Extremely high Spindle vibration control Extremely high Blade quality High Servo motor precision High Cooling system stability Medium Infrared laser guidance Supportive only A poorly built machine with laser guidance will still produce inaccurate cuts. Meanwhile, a High-rigidity Bridge Saw with stable rails and quality servo systems can achieve excellent precision even without infrared assistance. For example: A heavy-duty granite bridge saw with a reinforced cast-iron structure operating continuously for 72 hours in a high-temperature workshop may maintain cutting deviation within ±0.5 mm because of structural rigidity — not because of the laser itself.   Infrared Laser Guidance vs CNC Automatic Positioning Modern stone factories increasingly compare traditional infrared bridge saws with CNC bridge saw machines.   Here is the practical difference: Infrared Laser Guidance CNC Automatic Positioning Manual alignment assistance Fully automatic positioning Lower cost Higher investment Suitable for small workshops Suitable for mass production Depends on operator skill Reduced human intervention Faster installation Higher automation complexity Good for simple straight cuts Excellent for complex cutting patterns For small and medium-sized fabrication shops, infrared bridge saws remain highly popular because they offer a good balance between affordability and operational efficiency.   However, for factories producing customized countertops, sink cutouts, and irregular stone shapes, CNC bridge saws provide superior repeatability and automation.   Common Situations Where Infrared Guidance Is Especially Useful 1. Marble Slab Cutting Marble often contains natural veins and color variations. Operators use infrared lines to optimize cutting direction and preserve visual aesthetics.   2. Tombstone Manufacturing Symmetrical engraving borders and edge cuts require accurate positioning to maintain consistency across batches.   3. Quartz Countertop Processing Laser guidance helps align sink holes, faucet openings, and edge trimming before final cutting.   4. Thin Tile Production Thin ceramic and stone tiles are more sensitive to alignment deviations. Infrared positioning reduces edge waste and cracking risks.   Situations Where Infrared Guidance May Be Less Important Infrared systems are useful, but not every workshop absolutely needs them.   1. Fully Automated CNC Production Lines: Modern CNC systems already calculate and control cutting paths digitally. In these cases, the operator relies more on software calibration than visual laser alignment.   2. Experienced Master Operators: Some highly experienced operators can manually align slabs very accurately using traditional measurement methods.   3. Low-Precision Rough Cutting: For rough block cutting or preliminary slab sizing, laser guidance may provide limited additional value.   Does Infrared Guidance Affect Cutting Speed? Indirectly, yes. The laser itself does not increase blade rotation speed or feed speed. However, it reduces: Repositioning time Measuring time Alignment corrections Operator hesitation This improves overall workflow efficiency. For example: A factory processing 50 granite countertops daily may save 1–2 labor hours per shift simply by reducing repeated measurements and alignment adjustments. Over a year, this operational efficiency improvement becomes financially meaningful.   Frequently Asked Questions (FAQ) Q1: Can infrared laser guidance improve actual blade precision? No. The laser helps with positioning accuracy before cutting. Actual cutting precision still depends on machine rigidity, blade quality, rail systems, and spindle stability.   Q2: Is infrared guidance necessary for granite cutting? It is highly recommended, especially for expensive granite slabs where positioning mistakes can cause costly waste.   Q3: Does laser guidance require frequent maintenance? Usually not. Most systems only require occasional calibration and lens cleaning.   Q4: Can infrared systems work in dusty stone workshops? Yes, but industrial-grade sealed laser systems perform better in environments with heavy dust and water spray.   Q5: Is infrared guidance suitable for beginners? Absolutely. It helps reduce operator training difficulty and improves confidence during machine operation.   How to Choose a Stone Cutting Machine Beyond Laser Features When evaluating a stone cutting machine, professional buyers should focus on the complete system instead of only the laser feature. Important evaluation factors include: Machine body structure thickness Rail and guide brand quality Servo motor stability Cutting blade compatibility Water cooling efficiency Electrical system reliability Software integration After-sales technical support Spare parts availability Laser calibration stability A reliable supplier should provide: Real factory operation videos Long-hour continuous cutting demonstrations Accuracy testing reports Customer project references Export experience for your market These factors build long-term production reliability far more than a single accessory feature.   Final Verdict: Is Infrared Laser Guidance Necessary? Infrared laser guidance is not the core source of cutting precision — but it is an extremely practical tool that improves positioning efficiency, reduces operator errors, and enhances workflow consistency.   For most stone fabrication workshops, especially those processing valuable slabs or handling medium-to-high production volumes, infrared guidance offers clear operational benefits at relatively low cost.   However, buyers should understand that true cutting accuracy ultimately depends on the machine’s structural quality, motion control system, and overall engineering design.   The best approach is to view infrared laser guidance as a productivity-enhancing assistant rather than a replacement for high-quality machine manufacturing.
    Read More
  • How Can an Automatic Profiling Machine Reduce Your Labor Costs?
    How Can an Automatic Profiling Machine Reduce Your Labor Costs?
    May 20, 2026
    In today’s stone processing industry, rising labor costs and increasing competition are forcing factories to rethink how they produce stone borders, countertop edges, tombstone profiles, stair noses, and decorative moldings. Traditional manual profiling methods are no longer enough for companies that want consistent quality, faster delivery, and scalable production.   This is where an automatic stone profiling machine becomes a game changer. Whether you are producing granite countertop edges, marble decorative lines, cemetery stones, or customized architectural profiles, an automatic profiling machine can significantly reduce labor dependence while improving productivity and product consistency.   This article explains in detail how automatic profiling machines help stone factories lower operating costs, improve efficiency, and increase profitability.   What Is an Automatic Profiling Machine? An Automatic CNC Profiling Machine is a stone processing machine designed to automatically shape, grind, and polish stone edges or surfaces according to preset templates or programmed paths. These machines are widely used for: Granite countertop edge profiling Marble decorative molding production Tombstone edge shaping Stair edge processing Sink edge fabrication Curved stone line processing Window sill and border production Architectural stone decoration Compared with manual edge grinding, automatic profiling machines use CNC control systems, precision guide rails, and stable spindle motors to perform continuous and repeatable processing with minimal operator intervention.   Why Labor Costs Are Increasing in Stone Factories Many stone factories still rely heavily on manual labor for profiling work. However, several industry challenges are making this increasingly expensive: 1. Skilled Workers Are Harder to Find Experienced stone polishing and profiling workers require years of training. In many countries, younger workers are unwilling to enter dusty and physically demanding stone workshops. Factories often face: Labor shortages High recruitment costs Long training periods Worker turnover problems   2. Manual Processing Is Slow Traditional profiling usually involves: Manual measurement Repeated grinding Multiple polishing steps Frequent quality inspections A skilled worker may complete only a limited number of profiles per day, especially for complex shapes.   3. Human Error Causes Material Waste Inconsistent hand polishing can lead to: Uneven edge shapes Surface burn marks Dimension deviations Stone cracking For expensive marble or quartz slabs, even a small mistake can result in significant losses.   How an Automatic Profiling Machine Reduces Labor Costs 1. One Operator Can Manage Multiple Machines One of the biggest advantages of automation is labor reduction. With a traditional manual setup: One worker often handles one processing station. With an automatic profiling machine: One trained operator can supervise 2–4 machines simultaneously. This directly reduces: Worker salaries Overtime expenses Shift management pressure For example, a medium-sized countertop factory processing 200 linear meters per day may reduce its profiling workforce from 6 workers to 2 workers after upgrading to automatic equipment.   2. Continuous Automatic Processing Reduces Downtime Manual profiling work usually stops because of: Worker fatigue Break times Inconsistent operating speed Tool adjustment delays Automatic profiling machines can run continuously for long periods with stable performance. In real production environments, High-quality Profiling Machines can maintain stable profiling precision even during continuous multi-shift operation. This helps factories: Increase daily production output Shorten delivery times Accept larger orders without hiring more workers   3. Faster Processing Speed Improves Production Efficiency Automatic profiling machines use: High-speed spindle motors Automatic feeding systems Multi-head processing structures Programmable tool paths Compared with manual grinding, processing speed can increase significantly. Example Comparison Processing Method Average Daily Output Workers Required Manual Profiling 80–120 meters 4–6 workers Automatic Profiling Machine 250–400 meters 1–2 workers For factories handling large export orders, this productivity improvement can dramatically reduce per-unit labor costs.   4. Reduced Rework Saves Hidden Labor Expenses Rework is one of the most overlooked labor costs in stone processing. Manual profiling often creates: Inconsistent curves Uneven polishing gloss Edge asymmetry Size variation Automatic profiling machines use template tracking or CNC programming to maintain consistent shapes across every stone piece. This reduces: Secondary polishing Product rejection rates Customer complaints Return processing costs For export-oriented factories, consistency is especially important because overseas buyers usually require batch uniformity.   5. Lower Training Costs for New Workers Training an experienced manual stone profiling worker may take several months or even years. By contrast, modern automatic profiling machines are designed with: User-friendly control systems Touchscreen interfaces Automatic parameter settings Preset processing programs New operators can often learn basic machine operation within a much shorter time. This helps factories: Reduce training investments Quickly expand production capacity Maintain stable production during worker turnover   6. Automatic Tool Compensation Improves Accuracy Advanced profiling machines can automatically compensate for tool wear. This feature helps maintain: Stable profile dimensions Consistent polishing quality Uniform edge depth Without automatic compensation, manual operators must frequently stop production to manually adjust tools. This not only wastes labor time but also increases the risk of processing errors.   7. Lower Dependence on Highly Skilled Craftsmen Traditional stone profiling relies heavily on experienced craftsmen. However, factories that depend too much on individual workers face operational risks: Workers resign unexpectedly Skilled labor costs continue rising Production quality varies between operators Automation converts manual experience into standardized machine processing. This creates: Stable product quality Easier factory management Predictable production efficiency   Automatic Profiling Machine vs Manual Processing Factor Manual Processing Automatic Profiling Machine Labor Requirement High Low Production Speed Slow Fast Product Consistency Depends on worker skill Highly consistent Material Waste Higher Lower Training Difficulty High Moderate Long-Term Operating Cost Increasing More controllable Suitable for Mass Production Limited Excellent   Real Application Scenarios 1. Granite Countertop Factories Automatic profiling machines are widely used for: Bullnose edges Ogee edges Beveled countertop profiles Factories producing kitchen countertops for North American markets often require large-volume consistent edge processing. Automation helps them: Meet tight delivery schedules Reduce manual polishing teams Improve export competitiveness   2. Tombstone Manufacturing Workshops Cemetery stone production requires: Symmetrical decorative lines Smooth curved surfaces Consistent polishing quality Automatic profiling equipment improves repeatability while reducing dependence on experienced craftsmen. This is especially valuable during peak production seasons.   3. Architectural Stone Decoration Projects Large hotel, villa, and commercial building projects often involve: Decorative stone borders Roman columns Window frames Stair edges Automatic profiling machines help factories efficiently process large quantities of identical decorative components.   Frequently Asked Questions (FAQ) Q1: Can automatic profiling machines process both marble and granite? Yes. Most modern profiling machines can process: Marble, Granite, Quartz, Artificial stone, Limestone. Different tools and processing parameters are used depending on material hardness.   Q2: Is CNC programming difficult for profiling machines? Not necessarily. Many machines now use: Template-based operation Visual touchscreen interfaces Preset profile libraries Basic operation can usually be learned quickly.   Q3: How much labor can a factory realistically save? This depends on production scale and product type. However, many factories reduce profiling-related labor costs by 40%–70% after introducing automatic equipment.   Q4: What maintenance is required? Routine maintenance usually includes: Guide rail cleaning Lubrication Cooling system inspection Tool replacement Electrical system checks Proper maintenance helps ensure long-term stable operation.   How to Choose the Right Automatic Profiling Machine When selecting a profiling machine, buyers should evaluate: Processing Requirements Straight edges or curved profiles? Granite or marble? Mass production or customized processing? Machine Structure A heavy-duty machine frame provides: Better vibration resistance Higher precision Longer service life Automation Level Look for features such as: Automatic feeding CNC control Multi-head polishing Automatic tool compensation Supplier Experience Choose suppliers with: Stone industry experience Export experience Technical support capability Spare parts availability   Final Thoughts As labor costs continue rising worldwide, stone processing factories must improve efficiency to remain competitive. An Multi-Function Stone Profiling Machine is no longer just a production upgrade — it is a long-term cost control solution. By reducing manual dependence, improving processing consistency, increasing production speed, and minimizing material waste, automatic profiling machines help factories achieve: Lower labor costs Higher output Better product quality Faster order delivery Stronger market competitiveness For stone manufacturers aiming to expand production while controlling operational expenses, investing in automatic profiling technology is becoming an increasingly practical and profitable choice.    
    Read More
  • Why Stone CNC Machines Produce Too Much Dust
    Why Stone CNC Machines Produce Too Much Dust
    May 13, 2026
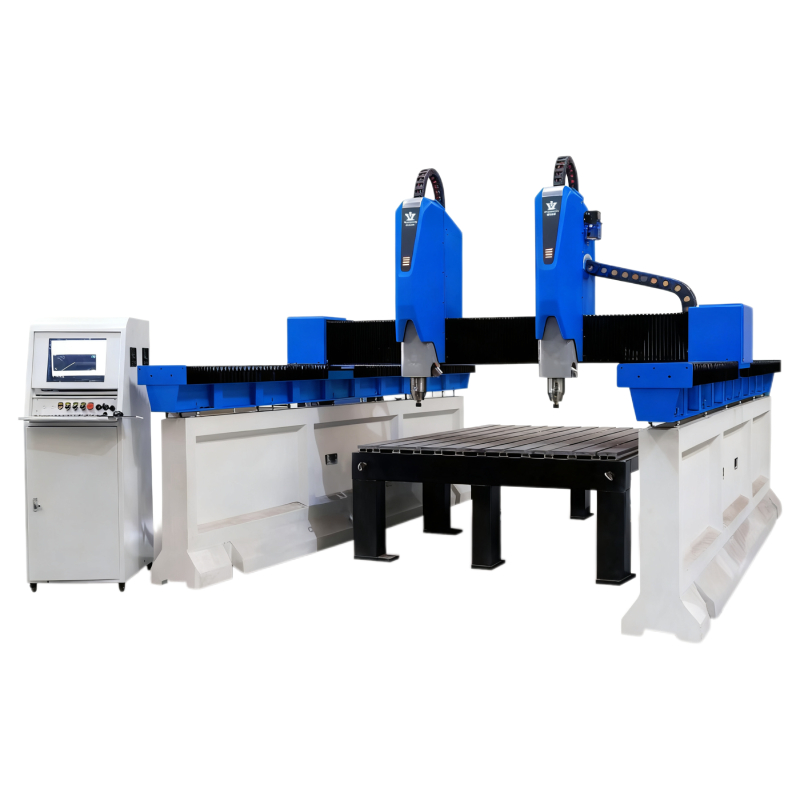
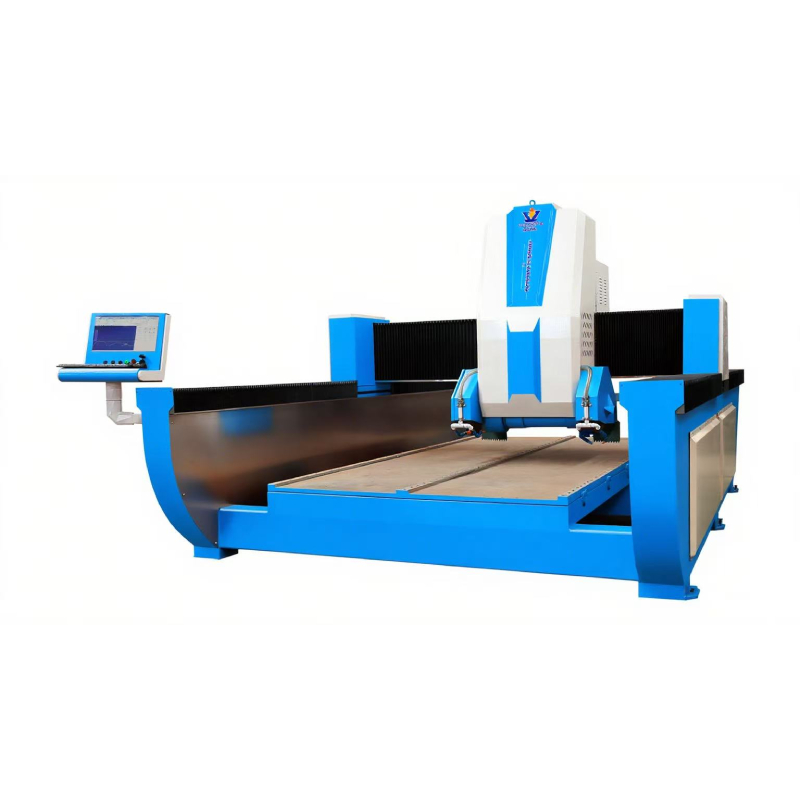
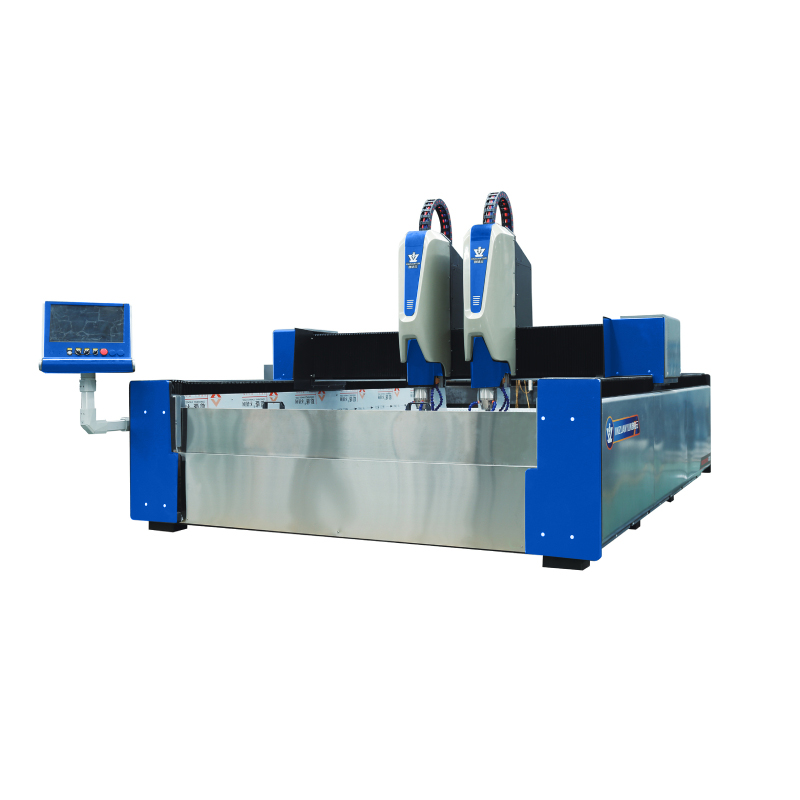
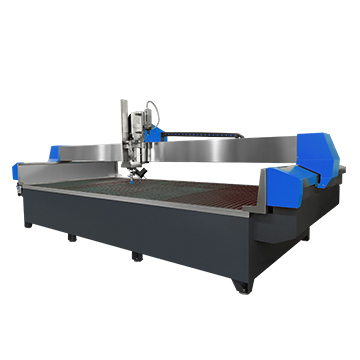
    Stone CNC machines are essential equipment in the modern stone fabrication industry. They are widely used for cutting, engraving, polishing, profiling, and shaping materials such as granite, marble, quartz, sandstone, and artificial stone. However, one of the most common problems faced by workshop owners and machine operators is excessive dust during production.   Too much dust does not only create an unpleasant working environment—it can also shorten machine lifespan, reduce product quality, increase maintenance costs, and create serious health risks for workers. If your stone CNC machine is producing more dust than expected, it is usually a sign that something in the cutting system, tooling setup, or dust control process needs attention.   This article explains the real reasons why Industrial Stone CNC Machines generate too much dust, how to diagnose the issue, and what practical solutions can improve your production environment.   Why Dust Control Matters in Stone Processing Stone dust is not ordinary dust. During cutting or engraving, machines grind hard mineral materials into fine particles. These particles often contain silica, calcium carbonate, and other abrasive minerals.   Excessive dust can cause: Reduced visibility during operation Poor engraving or cutting accuracy Faster wear of guide rails, bearings, and screws Clogged electrical cabinets and cooling fans Increased cleaning labor costs Worker respiratory risks Lower workshop efficiency For factories running 8–12 hours daily, poor dust control can lead to frequent machine downtime and unstable production quality.   Main Reasons Why Stone CNC Machines Produce Too Much Dust 1. Dry Cutting Instead of Wet Cutting The most common reason is operating the machine without sufficient water cooling. When cutting stone dry, friction between the tool and stone surface instantly releases fine powder into the air. Water helps suppress dust, cool the cutting tool, and wash debris away from the cutting zone. Example: A bridge saw cutting 30mm granite slab without water can create several times more airborne dust than the same machine with a properly adjusted water spray system. Solution: Check water pump pressure Ensure nozzles are aimed directly at the cutting point Clean blocked pipes regularly Maintain continuous water flow during cutting 
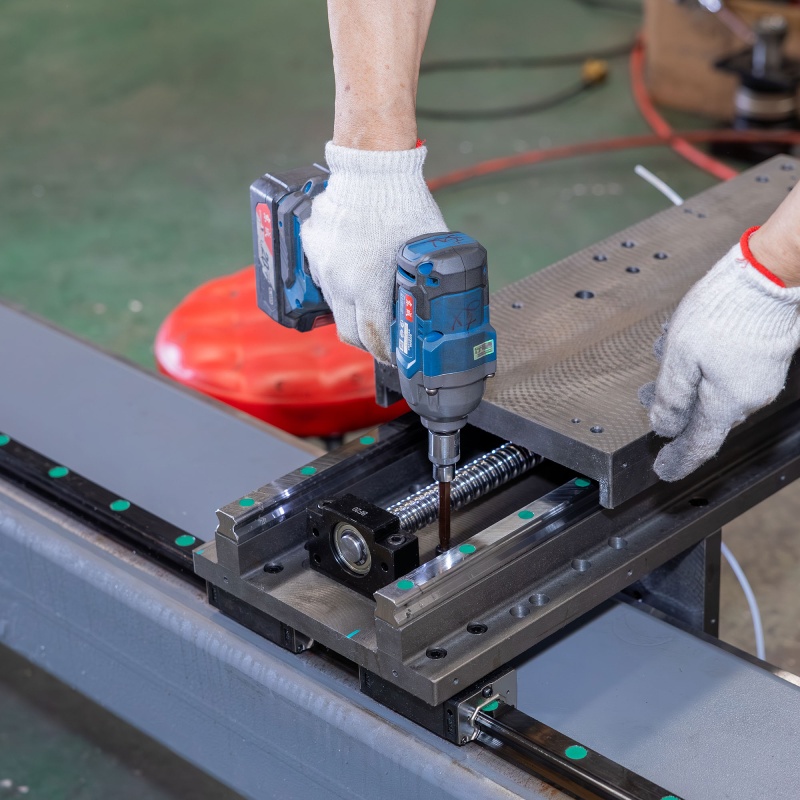
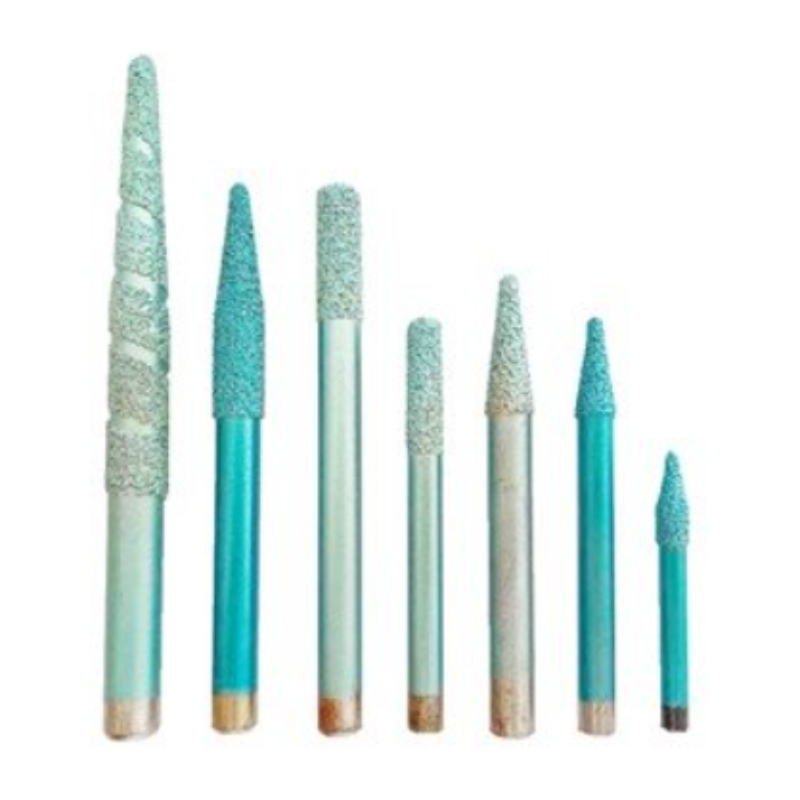
2. Worn or Low-Quality Diamond Tools Old or poor-quality blades and bits grind stone inefficiently. Instead of clean cutting, they crush material aggressively, producing more powder and chipping. Signs of tool wear: Slower cutting speed Burning marks on stone Rough edges Excessive vibration More dust than normal Comparison: Sharp premium diamond blade: smooth cut, less dust, faster production Worn cheap blade: rough cut, heavy dust, slower speed Solution: Replace dull tools on time Use tools matched to granite, marble, quartz, or engineered stone Buy from reliable suppliers 3. Wrong Feed Speed or Spindle Speed Machine parameters directly affect dust generation. If feed speed is too slow, the tool rubs instead of cutting efficiently. If spindle speed is too high, material can over-fragment into fine particles. Example: For marble engraving, excessive RPM with shallow feed often creates powder clouds instead of clean chips. Best Practice: Adjust according to Stone hardness Tool diameter Cutting depth Material thickness Cooling condition Professional CNC suppliers usually provide recommended parameter charts. 
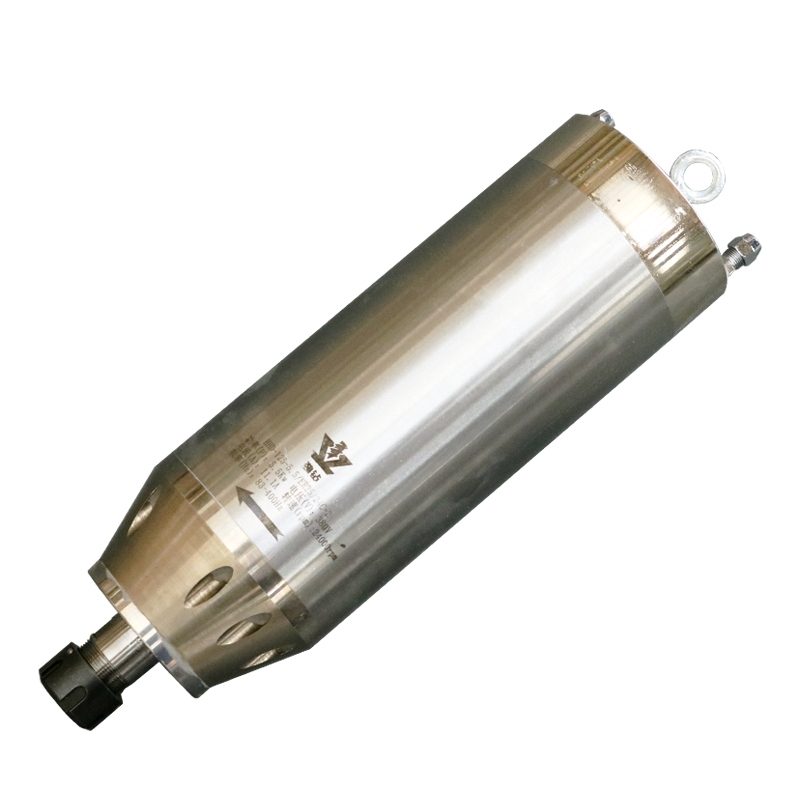
4. Poor Dust Collection System Many workshops install CNC machines but ignore industrial dust extraction systems. Without suction hoods, vacuum pipes, or cyclone collectors, dust remains airborne and spreads across the factory. Common Problems: Weak vacuum motor Leaking pipes Full dust bags Small hose diameter Wrong hood position Solution: Install a proper dust collection system designed for stone processing, not woodwork only.   5. Incorrect Tool Path Programming Bad CAM programming can increase dust unnecessarily. For example: Too many shallow repeated passes Excessive idle grinding movement Recutting the same path Wrong entry angle These actions multiply friction and generate unnecessary powder. Better Method: Use optimized tool paths with: Correct step-down depth Efficient roughing passes Smart finishing strategy Reduced air cutting time 6. Processing Very Dry or Brittle Stone Some natural stones naturally break into powder more easily than others. Material Dust Tendency Marble Medium Granite Medium Limestone High Sandstone High Quartz Stone Fine Dust High If you frequently process sandstone or limestone, dust levels will naturally rise.   7. Poor Workshop Ventilation Even if the machine itself is working normally, weak airflow inside the workshop traps dust. Dust then circulates around operators, settles on machines, and re-enters the air. Recommended Setup: Exhaust fans Cross ventilation Air filtration units Zoned machine layout Daily floor washing   How to Reduce Dust from Stone CNC Machines 1. Check Water Supply Daily Inspect: Pump pressure Pipe blockage Nozzle angle Water tank cleanliness   2. Replace Tools Before Failure Do not wait until cutting quality drops badly.   3. Optimize CNC Parameters Test spindle speed and feed rate combinations for each material.   4. Install Industrial Dust Extraction Especially important for dry engraving, edge profiling, and lettering work.   5. Train Operators Many dust issues come from operator habits rather than machine defects.   Does Excessive Dust Mean the Machine Is Poor Quality? Not always. Even a High-end Stone CNC Machine can create too much dust if: Wrong tooling is used Parameters are incorrect Water system is blocked Dust collector is undersized Maintenance is neglected Likewise, a properly maintained mid-range machine can run very cleanly. The key is total system management.   Buyer Questions Before Purchasing a Stone CNC Machine If you plan to import a machine, ask suppliers these questions: Does the machine support wet and dry processing? Is dust hood or vacuum system included? What water cooling system is installed? What tooling recommendations are provided? Can you share parameter settings for granite and marble? How is electrical cabinet dust protection designed? What maintenance schedule is recommended? These questions help identify professional suppliers.   Final Thoughts If your stone CNC machine produces too much dust, the problem is usually not just the machine itself. It is often a combination of tooling quality, water supply, programming, speed settings, material type, and workshop dust management. By solving these areas systematically, factories can achieve: Cleaner production Better cutting quality Longer machine life Lower maintenance cost Safer working conditions Higher output efficiency For growing stone fabrication businesses, controlling dust is not optional—it is a key part of profitable production.    
    Read More
  • How Do I Choose the Right Diamond Bits for 3D Stone Carving?
    How Do I Choose the Right Diamond Bits for 3D Stone Carving?
    May 07, 2026
    Choosing the right diamond bits for 3D stone carving is one of the most important decisions in CNC stone processing. Even the most advanced stone carving machine cannot deliver clean details, smooth curves, or efficient production if the tooling is incorrect. Whether you are carving marble statues, granite memorials, relief panels, sink basins, columns, or custom architectural decorations, selecting the proper diamond bit directly affects cutting speed, tool life, surface finish, and final profitability.   In this guide, we will explain how to choose the right diamond bits for 3D stone carving based on stone type, carving depth, design complexity, machine spindle power, and production goals.   Why Diamond Bits Matter in 3D Stone Carving Natural stone is hard, abrasive, and expensive. Unlike wood or plastic, stone requires tooling that can withstand high friction and maintain precision over long working hours. High-quality diamond bits help you achieve: Faster material removal Cleaner edge finishing Better 3D contour accuracy Lower risk of stone cracking Longer tool lifespan Reduced machine downtime Lower cost per finished product For example, when carving a marble statue for 10 continuous hours, a premium sintered diamond bit can maintain stable cutting performance, while a low-grade electroplated bit may lose sharpness quickly and create burn marks or uneven surfaces.   Main Types of Diamond Bits for 3D Stone Carving Different carving stages require different tools. Professional workshops usually use multiple bit types in one project. 1. Flat End Diamond Bits Best for: Rough cutting Pocketing Removing large stone volume Creating flat surfaces These bits are commonly used in the first machining stage when shaping blocks into basic forms.   2. Ball Nose Diamond Bits Best for: 3D contour carving Sculptures Curved surfaces Human faces and statues Ball nose bits are essential for detailed 3D carving because they create smooth tool paths and natural curves.   3. V Shape Diamond Bits Best for: Letter engraving Decorative lines Fine grooves Border patterns Often used for tombstone lettering and ornamental stone signs.   4. Tapered Diamond Bits Best for: Deep narrow carving Fine detail work Relief art Intricate corners Tapered bits provide strength while reaching small areas.   5. Finger Bits Best for: Internal hole enlargement Sink cutouts Edge shaping Aggressive stock removal Frequently used in countertop fabrication.   How to Choose Based on Stone Material Different stones require different bond hardness and tool structure. For Marble: Marble is softer than granite and easier to carve. Recommended bits: Electroplated bits for detail carving Ball nose bits for sculpture work Medium grit polishing tools Advantages: Faster carving speed Better fine detail reproduction   For Granite: Granite is harder and more abrasive. Recommended bits: Sintered diamond bits Reinforced core structure Lower feed speed with stable coolant Granite carving requires stronger tooling because low-quality bits wear quickly.   For Quartz / Engineered Stone: Quartz contains resin and hard minerals. Recommended bits: Heat-resistant diamond tools Anti-loading design Continuous water cooling   How to Choose Based on Carving Stage Stage 1: Roughing Goal: Remove maximum material quickly. Choose: Large diameter flat end bits Coarse grit Strong shank design Example: 12mm to 20mm diamond roughing tools for statue blank shaping.   Stage 2: Semi-Finishing Goal: Refine shape before final details. Choose: Ball nose bits Medium grit Moderate diameter   Stage 3: Finishing Goal: Final texture and precision. Choose: Small ball nose bits Tapered detail bits Fine grit tools Example: 3mm to 6mm bits for facial features or floral carving.   How Bit Size Affects Results Large Diameter Bits Advantages: Faster roughing Stronger structure Longer life under heavy load Disadvantages: Cannot produce fine detail   Small Diameter Bits Advantages: High precision Better detail resolution Suitable for lettering and sculpture finishing Disadvantages: Slower removal rate Easier to break if feed rate is too aggressive Best practice: Use larger tools first, then smaller finishing bits later.   Bond Type: Electroplated vs Sintered Diamond Bits Electroplated Diamond Bits Pros: Sharper cutting feel Good for marble and soft stone Lower initial cost Cons: Shorter lifespan Best for short runs or detailed carving.   Sintered Diamond Bits Pros: Much longer life Better for granite Suitable for industrial production Cons: Higher purchase price Best for factories running machines daily.   Common Buyer Mistakes When Choosing Diamond Bits 1. Using One Tool for Every Job A single bit cannot rough cut granite and also finish a marble portrait efficiently.   2. Choosing Cheapest Tools Only Low-price tools often increase total cost through breakage, poor finish, and lost production time.   3. Ignoring Machine Power A small spindle machine may struggle with oversized bits.   4. Wrong Feed Speed Even premium bits fail if feed rate is too fast or spindle RPM is incorrect.   5. No Cooling System Water cooling greatly extends tool life and improves surface quality.   Practical Example: Tombstone Relief Carving If producing granite memorial relief panels: Recommended Tool Set 16mm flat bit for roughing background 8mm ball nose for shaping portrait contours 4mm tapered ball nose for facial details V bit for lettering Polishing tools for final shine This multi-tool workflow improves speed and quality compared with using only one bit.   How to Evaluate a Good Diamond Bit Supplier Before ordering, ask: What stone materials is the bit designed for? Is it electroplated or sintered? Recommended RPM and feed rate? Expected lifespan in granite or marble? Can custom sizes be supplied? Is balancing tested for CNC spindle use? Do they provide after-sales support? Reliable suppliers usually offer technical parameters instead of only saying “high quality”.   Maintenance Tips to Extend Tool Life Use stable water cooling Avoid sudden impact into stone Keep spindle concentric and balanced Clean tool after use Store dry and organized Replace worn tools before catastrophic failure A properly maintained diamond bit can reduce tooling cost significantly over one production season.     FAQ 1. What is the best diamond bit for 3D stone statues? Ball nose sintered diamond bits are usually the best choice for smooth contours and detailed sculpture work.   2. Can I use wood CNC bits on stone? No. Wood tools are not designed for stone hardness and will fail quickly.   3. How long do diamond bits last? It depends on material, cooling, machine settings, and quality. Marble tools last longer than granite tools in most cases.   4. Should I buy cheap bits for testing? Testing is acceptable, but production work should use stable professional-grade tools.   Final Thoughts Choosing the right diamond bits for 3D stone carving is not only about price—it is about matching the tool to the stone, machine, and final design. Smart tool selection improves carving speed, surface finish, precision, and overall profit.   For professional stone factories, the best strategy is to build a complete tool system: roughing bits, contour bits, detail bits, lettering bits, and polishing tools. This creates consistent quality and faster production across statues, countertops, memorials, and decorative stone projects.   If you are investing in a CNC stone carving machine, choosing the right diamond tooling is just as important as choosing the machine itself.
    Read More
  • What Materials Can a Waterjet Cut?
    What Materials Can a Waterjet Cut?
    Apr 27, 2026
    Waterjet cutting has become one of the most versatile and precise manufacturing technologies across industries such as stone processing, metal fabrication, automotive, aerospace, and architectural decoration. But one of the most common questions buyers ask is:   “What materials can a waterjet actually cut?” This article gives you a clear, experience-based answer—backed by real applications, comparisons, and frequently asked questions—to help you evaluate whether a waterjet system fits your business.   1. How Waterjet Cutting Works (Quick Overview) A Industrial Waterjet Cutting Machine uses ultra-high-pressure water (typically 3000–6000 bar), sometimes mixed with abrasive particles like garnet, to cut through materials. Pure waterjet → soft materials (rubber, foam, textiles) Abrasive waterjet → hard materials (stone, metal, glass) Unlike thermal cutting methods (laser or plasma), waterjet cutting is a cold cutting process, meaning: No heat-affected zone (HAZ) No material deformation No microcracks in brittle materials   2. Materials a Waterjet Can Cut (With Real Applications) 2.1 Stone Materials (Core Industry Application) Multifunctional Waterjet Machines are widely used in stone fabrication factories. Cuttable materials: Granite Marble Quartz Artificial stone Ceramic tiles Real application scenario: In countertop manufacturing, a waterjet can cut complex sink openings and curved edges in quartz slabs (20–30mm thick) with clean edges, eliminating secondary polishing. Why waterjet is preferred: No edge chipping (common with blade cutting) Ideal for intricate inlays and mosaics High precision (±0.1mm achievable)   2.2 Metals (From Thin Sheets to Thick Plates) Cuttable materials: Stainless steel Carbon steel Aluminum Copper Titanium Real application scenario: A fabrication workshop can cut 50mm thick stainless steel plates for industrial flanges without thermal distortion—something laser cutting struggles with at this thickness. Key advantage: Maintains original material properties (no heat damage) Suitable for aerospace and precision engineering parts   2.3 Glass (Without Cracking) Cuttable materials: Float glass Laminated glass Bulletproof glass Real application scenario: Architectural companies use waterjet cutting to create custom glass panels with complex patterns for facades and interior partitions. Why it works: No thermal stress → prevents cracking Smooth cutting edges   2.4 Ceramics and Porcelain Cuttable materials: Porcelain slabs Ceramic tiles Technical ceramics Real application scenario:   High-end interior projects often require precise cutting of large-format porcelain slabs (1200×2400mm) for seamless wall installations.   2.5 Composites and Advanced Materials Cuttable materials: Carbon fiber Fiberglass Kevlar Real application scenario:   In automotive and aerospace industries, waterjet cutting is used for carbon fiber panels without delamination, which is a major issue with mechanical cutting.   2.6 Soft Materials (Using Pure Waterjet) Cuttable materials: Rubber Foam Leather Textiles Food products Real application scenario:   Manufacturers use pure waterjet to cut rubber gaskets with high repeat accuracy and no burning edges. 3. Materials That Are Challenging (But Still Possible) While waterjet is extremely versatile, some materials require careful handling: Tempered glass → cannot be cut (will shatter) Very thick materials (>200mm) → slower cutting speed Highly reflective metals → actually easier than laser, but still need parameter optimization   4. Waterjet vs Other Cutting Methods (Buyer Comparison)   4.1 Waterjet vs Laser Cutting Feature Waterjet Laser Heat impact None High Material range Very wide Limited (mainly metals) Thickness capability Excellent Limited Precision High Very high (thin materials) Conclusion: Choose waterjet for versatility and thick materials Choose laser for ultra-fast thin metal cutting   4.2 Waterjet vs CNC Saw Cutting (Stone Industry) Feature Waterjet Bridge Saw Shape capability Complex curves Straight cuts Edge quality Smooth May chip Material stress None Possible cracks Conclusion:   Waterjet is ideal for custom, high-value stone products, while saws are better for mass straight cutting.   5. Frequently Asked Questions  Q1: Can a waterjet cut anything? Almost—but not literally everything. It can cut most materials except tempered glass and some extremely fragile composites.   Q2: How thick can a waterjet cut? Steel: up to 150–200mm (depending on power) Stone: typically 50–100mm efficiently   Q3: Will water damage the material? No. The cutting process is controlled and localized. For example: In stone processing, even after continuous 48-hour operation, slabs remain structurally stable with no water penetration issues.   Q4: Is waterjet cutting expensive? Initial investment is higher, but: Reduces rework Eliminates secondary finishing Cuts multiple materials on one machine ROI is strong for multi-material factories.   Q5: Why do high-end stone factories prefer waterjet? Because it enables: Custom designs (medallions, inlays) High precision for export markets Premium product pricing   6. How to Choose the Right Waterjet Machine When selecting a waterjet system, buyers should focus on: 1. Application Scenario Stone fabrication → prioritize stability and table size Metal cutting → focus on pressure and pump system   2. Cutting Accuracy Look for machines that maintain ±0.1mm precision during long working cycles.   3. Pump Quality The pump is the core: Intensifier pump (common) Direct drive pump (energy-saving option)   4. After-Sales Support Critical for overseas buyers: Remote diagnostics Spare parts availability Technical training 7. Final Thoughts CNC Controlled Waterjet Cutting stands out because of one key advantage: It can cut almost any material without changing tools or processes. From granite countertops to aerospace titanium parts, from glass art to rubber seals—waterjet technology delivers precision, flexibility, and reliability across industries.   For buyers in the stone machinery sector, investing in a waterjet system is not just about cutting—it's about expanding product capability and entering higher-value markets.  
    Read More
  • Why Is Your Polished Stone Surface Showing “Cloudiness” or Uneven Shine?
    Why Is Your Polished Stone Surface Showing “Cloudiness” or Uneven Shine?
    Apr 22, 2026
    In high-end stone processing—whether you are producing kitchen countertops, tombstones, or architectural panels—surface finish is not just about aesthetics. A perfectly polished surface reflects craftsmanship, machine precision, and material quality.   Yet many manufacturers encounter a frustrating issue: cloudiness, haze, or uneven shine after polishing. Even when using advanced CNC machines and polishing lines, the final result may still fall short of expectations.   This article breaks down the real causes, practical solutions, and machine-level optimization strategies, based on actual production scenarios—helping both operators and buyers understand how to eliminate this issue at the source.   1. What Does “Cloudiness” in Stone Polishing Actually Mean? “Cloudiness” typically refers to: A milky or hazy appearance on the surface Inconsistent gloss levels across different areas Visible swirl marks or dull patches under light reflection Real Production Scenario: In a tombstone factory running continuous polishing for 10 hours per shift, operators noticed that black granite slabs showed uneven gloss—especially under LED inspection lights. The issue was not visible immediately after polishing, but became obvious after drying.     This indicates that surface defects are often hidden during wet processing but exposed after drying, which is a critical clue.   2. Main Causes of Uneven Shine (With Practical Analysis) 2.1 Abrasive Grit Sequence Problems If polishing pads or abrasives are: Skipped (e.g., jumping from 400# to 1500#) Worn out unevenly Poor quality or inconsistent bonding The surface will not be uniformly refined, causing micro-scratches that scatter light. Comparison Insight: Proper sequence (e.g., 50# → 100# → 200# → 400# → 800# → 1500# → 3000#) ensures gradual scratch removal Incorrect sequence leads to residual scratches, resulting in haze   2.2 Inconsistent Pressure and Machine Calibration Modern stone polishing machines rely heavily on: Stable pressure Even head distribution Accurate axis movement If your machine: Has uneven pressure across polishing heads Shows vibration at high RPM Lacks precise calibration You will get patchy gloss levels Real Case: On a bridge polishing machine running at 2800 RPM, a slight imbalance in spindle pressure (±5%) resulted in visible gloss differences across a 2-meter slab.   2.3 Water Supply Issues (Often Overlooked) Water is critical for: Cooling Debris removal Lubrication Problems include: Insufficient water flow Uneven distribution across polishing heads Dirty or recycled water with particles   This causes localized overheating and micro-abrasion, leading to dull areas.   2.4 Stone Material Differences Not all stones behave the same: Granite: Hard, requires more consistent polishing steps Marble: Softer, prone to over-polishing Quartz/artificial stone: Sensitive to heat and pressure   Even within the same slab, mineral composition variations can cause uneven reflection.   2.5 Operator Technique & Process Control Even with advanced machines, human factors matter: Incorrect feed speed Skipping inspection steps Not replacing worn abrasives on time   In mass production, small mistakes amplify into visible defects.   3. How to Fix Cloudiness: Practical Solutions That Work 3.1 Optimize the Polishing Process Use a complete and gradual abrasive sequence Ensure each step fully removes previous scratches Maintain consistent polishing time per stage    Tip: Do not rush high-grit polishing—it cannot fix deep scratches   3.2 Upgrade or Adjust Your Machine Setup From an equipment perspective: Use automatic pressure control systems Ensure spindle balance and vibration control Regularly calibrate multi-head stone polishing machines Application Scenario:   In a factory producing high-gloss quartz countertops for export to the U.S., upgrading to a polishing line with automatic pressure compensation improved gloss consistency by over 20%.   3.3 Improve Water Management System Install independent water flow control per head Use clean, filtered water Monitor flow rate continuously   This is especially important in high-temperature environments (>35°C) where evaporation affects polishing stability.   3.4 Match Process to Material Material Type Key Adjustment Granite Higher pressure + longer polishing time Marble Lower pressure + finer grit control Quartz Strict temperature control + stable speed     3.5 Implement Quality Inspection Standards Use gloss meters (target: 85–100 GU depending on stone) Inspect under dry conditions and strong lighting Standardize inspection after each polishing stage   4. Supplier Comparison: Why Machine Quality Matters When buyers compare suppliers, polishing quality is often the deciding factor. Low-End Machines: Manual pressure adjustment Inconsistent spindle performance Higher defect rates High-End Machines: CNC-controlled polishing paths Automatic pressure balancing Real-time monitoring systems Result: High-end machines reduce cloudiness not by chance—but by process control and repeatability.   5. Frequently Asked Questions  Q1: Why does my stone look perfect when wet but cloudy when dry? Because water temporarily fills micro-scratches. Once dry, light scattering reveals surface defects.   Q2: Can high-grit polishing remove cloudiness? No. High-grit abrasives only refine the surface. The root cause is usually in earlier polishing stages.   Q3: How often should polishing pads be replaced? In continuous production: Rough grits: every 2–3 days Fine grits: every 4–7 days   (Depends on material hardness and workload)   Q4: Is cloudiness caused by the machine or the operator? Usually both.  70% process control + 30% operator execution.   6. Expert Insight: Preventing the Problem at the Source From an engineering perspective, the best way to eliminate cloudiness is not re-polishing—but preventing defects during the first pass. This requires: Stable machine structure Intelligent control systems Standardized operating procedures   Conclusion Cloudiness or uneven shine is not a random defect—it is a system-level issue involving abrasives, machines, materials, and operators. For stone processing companies aiming at high-end export markets, solving this problem is essential for: Reducing rework costs Improving customer satisfaction Strengthening brand credibility   If your production line still struggles with inconsistent polishing results, it may be time to re-evaluate both your process and equipment setup—because in today’s competitive market, surface quality is your strongest sales argument.          
    Read More
  • What Is CAD/CAM in Stone Processing
    What Is CAD/CAM in Stone Processing
    Apr 13, 2026
    In today’s competitive stone industry, precision, efficiency, and automation are no longer optional—they are essential. Technologies like CAD and CAM have become the backbone of modern stone processing, enabling manufacturers to produce complex designs with high accuracy and consistency.   This article explains what CAD/CAM is, how it works in stone processing, and why it is critical for businesses using CNC stone machines.   1. What Is CAD/CAM? CAD (Computer-Aided Design) and CAM (Computer-Aided Manufacturing) are two integrated technologies used to design and manufacture products digitally. CAD: Used to create detailed 2D drawings or 3D models of stone products CAM: Converts those designs into machine instructions (G-code) for CNC machines   Simple Workflow: Design the product in CAD software Import the design into CAM software Generate toolpaths and machining strategies Execute the process on CNC stone machines 2. How CAD/CAM Works in Stone Processing In stone fabrication, CAD/CAM connects design and production seamlessly.   Example Application Scenario Imagine producing a custom marble countertop with an integrated sink: A designer creates a 3D model in CAD with exact dimensions and cutouts CAM software defines cutting paths, drilling positions, and polishing sequences A CNC bridge saw or 5-axis machine executes the job automatically  Result:   Even after continuous 48–72 hours of operation, the machine can maintain ±0.1 mm precision, ensuring perfect edge alignment and seamless sink integration.   3. Key Applications of CAD/CAM in Stone Industry 3.1 CNC Stone Cutting Bridge saws cut slabs into precise shapes Optimized nesting reduces material waste 3.2 Stone Engraving & Carving 3-axis and 5-axis CNC machines create: Tombstones Relief carvings 3D sculptures 3.3 Edge Profiling & Polishing Automatic generation of toolpaths for: Bullnose edges Beveled finishes Decorative profiles 3.4 Complex 3D Stone Products Statues, columns, and architectural elements Multi-axis robotic arms execute intricate designs   4. CAD/CAM vs Traditional Stone Processing Aspect Traditional Method CAD/CAM Method Accuracy Depends on worker skill High precision (±0.1 mm or better) Efficiency Manual, time-consuming Automated, faster production Complexity Limited designs Complex 3D geometries possible Material Waste Higher Optimized cutting paths Consistency Variable Repeatable quality   Conclusion: CAD/CAM significantly improves both productivity and product quality.   5. CAD/CAM Software Commonly Used in Stone Industry   Some widely used solutions include: AlphaCAM – Known for user-friendly interface and stone-specific modules SprutCAM – Popular for multi-axis and robotic arm programming AutoCAD – Used for basic 2D drafting Fusion 360 – Integrated CAD/CAM platform   Comparison Insight: AlphaCAM → Better for standard stone cutting and engraving SprutCAM → Stronger in 7-axis robotic applications and complex toolpaths   If your business involves robotic stone carving, SprutCAM is usually the better choice.   6. Real Production Scenario A stone factory producing granite tombstones implemented CAD/CAM with a 3-axis CNC machine: Production time reduced from 6 hours → 2.5 hours per piece Labor cost decreased by 40% Defect rate dropped below 2% Machine maintained stable performance under continuous multi-shift operation   This kind of data-driven improvement is exactly what modern buyers—and search engines—look for.   7. How to Choose the Right CAD/CAM System When selecting a solution, consider:   7.1 Machine Compatibility Ensure software supports: 3-axis / 5-axis CNC machines Bridge saws Robotic arms 7.2 Ease of Use Intuitive interface reduces training time 7.3 Post-Processor Support Must match your machine controller 7.4 Application Match Cutting → Simple CAM tools Sculptures → Advanced multi-axis CAM   8. Common Buyer Questions  Q1: Is CAD/CAM necessary for small stone workshops? Yes. Even small workshops benefit from improved accuracy and reduced material waste, especially for customized orders.   Q2: What is the difference between CAD and CAM? CAD is for design; CAM is for manufacturing. CAD creates the model, CAM tells the machine how to produce it.   Q3: Can CAD/CAM reduce material waste? Yes. CAM software optimizes cutting layouts, which can reduce waste by 10–25% depending on slab usage.   Q4: Does CAD/CAM require high investment? Initial costs exist, but ROI is fast due to labor savings, improved efficiency, and reduced errors.   Q5: How long does it take to learn CAD/CAM?   Basic operation can be learned in 1–2 weeks, while advanced multi-axis programming may take several months.   9. Expert Insight: Why CAD/CAM Is the Future From an industry perspective, CAD/CAM is not just a tool—it is a digital transformation strategy. Enables mass customization Reduces reliance on skilled labor Improves global competitiveness   For exporters, especially in markets like Europe and North America, adopting CAD/CAM is often a key decision factor for buyers.   10. Final Thoughts CAD/CAM technology has fundamentally changed how stone products are designed and manufactured. By integrating design and production, it allows stone factories to achieve: Higher precision Faster delivery Lower costs Greater design flexibility   If your business is involved in stone processing, adopting CAD/CAM is no longer optional—it is the foundation for scaling and competing globally.    
    Read More
  • How CNC Machines Are Used in Tombstone Production
    How CNC Machines Are Used in Tombstone Production
    Apr 08, 2026
    In today’s stone processing industry, CNC technology has become a core driver of efficiency, precision, and customization—especially in tombstone (headstone) production. From raw block cutting to intricate engraving, CNC machines enable manufacturers to deliver consistent quality while meeting highly personalized customer demands.   This article provides a practical, experience-based overview of how CNC machines are actually used in tombstone production, with real application scenarios, comparisons, and frequently asked questions.   1. Overview: Why CNC Machines Matter in Tombstone Manufacturing Traditional tombstone production relied heavily on manual carving and basic cutting tools. While craftsmanship was valuable, it came with limitations: Inconsistent quality Low production efficiency Limited design complexity CNC (Computer Numerical Control) machines solve these issues by offering: High precision (±0.01–0.05 mm depending on machine type) 24/7 continuous operation capability Repeatable results for batch production Flexible design execution (text, portraits, 3D reliefs)   2. Step-by-Step CNC Applications in Tombstone Production 2.1 Block Cutting and Shaping Machine Used: CNC Bridge Saw / CNC Cutting Machine Application Scenario: A granite block is first cut into slabs or basic tombstone shapes. For example, when processing a 2000×1000×300 mm granite block, a Automatic CNC Bridge Saw can maintain cutting deviation within ±0.5 mm even after 10 hours of continuous operation. Key Advantages: Straight, clean edges with minimal material waste Automated cutting paths reduce labor dependency Suitable for high-volume cemetery projects 2.2 Surface Profiling and Polishing Preparation Machine Used: CNC Milling Machine / 3-Axis Stone CNC Machine Application Scenario: Before engraving, the tombstone surface must be leveled and shaped. High Precision CNC Milling Machine ensures a perfectly flat or slightly curved surface, which is critical for later engraving accuracy. Technical Detail: Surface flatness can be controlled within ±0.02 mm Consistent results even on hard stones like granite   2.3 Engraving Text, Patterns, and Portraits Machine Used: 3-Axis or 5-Axis CNC Stone Engraving Machine Application Scenario: Engraving names, dates, religious symbols, and even high-resolution portraits directly onto the tombstone. For example: A 3-axis CNC machine can engrave standard text and 2D patterns at speeds of 3–6 m/min A 5-axis CNC machine can produce complex 3D relief carvings, such as angels or sculptures, with depth precision up to ±0.03 mm Real Use Case: In a cemetery project requiring 500 identical headstones, CNC engraving ensures every letter and symbol is perfectly aligned and consistent—something nearly impossible with manual methods. 2.4 Edge Shaping and Decorative Finishing Machine Used: CNC Profiling Machine / Edge Polishing Machine Application Scenario: Creating decorative edges such as beveled, rounded, or ogee profiles. Benefits: Uniform edge design across large batches Reduced polishing time Enhanced aesthetic value 2.5 3D Sculptural Elements (High-End Tombstones) Machine Used: 5-Axis CNC Machine or 7-Axis Robotic Arm Application Scenario: High-end tombstones often include statues, religious figures, or custom sculptures. Technical Capability: Multi-angle carving without repositioning the stone Ability to process complex geometries in a single setup Continuous operation for 48–72 hours without precision loss 3. CNC vs Traditional Methods: A Practical Comparison Aspect CNC Machines Traditional Manual Methods Precision ±0.01–0.05 mm Highly operator-dependent Efficiency 24/7 automated production Limited working hours Design Complexity Supports 2D & 3D designs Mostly simple patterns Consistency Perfect for batch orders Variations unavoidable Labor Cost Lower in long term Higher due to skilled labor   Conclusion: For modern tombstone manufacturers targeting export markets (USA, Europe, Middle East), CNC machines are no longer optional—they are essential for competitiveness.   4. How to Choose the Right CNC Machine for Tombstone Production Scenario-Based Recommendations: Small workshops (custom orders):→ 3-Axis CNC Engraving Machine  Medium factories (batch production):→ CNC Bridge Saw + 3-Axis Engraver High-end projects (sculptures & monuments):→ 5-Axis CNC or Robotic Arm System   5. Frequently Asked Questions (FAQ) Q1: What is the most suitable CNC machine for tombstone engraving? For standard text and patterns, a 3-axis CNC machine is sufficient. For portraits or 3D carvings, a 5-axis CNC machine is recommended.   Q2: Can CNC machines handle hard stones like granite? Yes. High-quality CNC machines can process granite continuously for 48–72 hours while maintaining stable accuracy and tool performance.   Q3: What file formats are required for engraving? Common formats include: DXF (2D designs) STL (3D models) BMP (for portrait engraving via software conversion)   Q4: How to ensure engraving quality? Key factors include: Machine rigidity and spindle quality Proper tool selection (diamond tools for granite) Stable software (e.g., CAD/CAM systems)   Q5: What are common mistakes buyers make? Choosing low-cost machines with unstable frames Ignoring after-sales support and training Not matching machine type with production needs   6. Expert Insights: What Buyers Often Overlook Based on real export experience, many buyers focus only on price, but overlook: Machine structure stability: affects long-term precision Control system compatibility: impacts ease of operation After-sales service: critical for overseas installation and training For example, during overseas installation projects, machines with poor calibration systems often require repeated adjustments, delaying production schedules by 3–7 days.   7. Final Thoughts CNC machines have transformed tombstone production from labor-intensive craftsmanship into a precise, scalable, and highly customizable manufacturing process. For buyers and manufacturers aiming to expand into international markets, investing in the right CNC solution means: Higher efficiency Better product consistency Stronger competitiveness If you are planning to upgrade your tombstone production line, understanding real application scenarios and making informed comparisons will help you choose the most suitable CNC solution—not just the cheapest one.  
    Read More
1 2 3
A total of3pages

leave a message

leave a message
If you are interested in our products and want to know more details,please leave a message here,we will reply you as soon as we can.
submit

Home

Products

WhatsApp

contact